Smart Groups bring the information-gathering features of Search/Reports into your Viewing Options by filtering the information in your guest's registration. In addition to your guests appearing in Ungrouped Members or in their Host's group, they can also be sorted into other groups, such as those requesting to be added to a mailing list, those purchasing special options, such as a photo opportunity, or those sponsoring at a particular level. It is recommended that you be familiar with Search/Reports before creating Smart Groups.
Creating a Smart Group
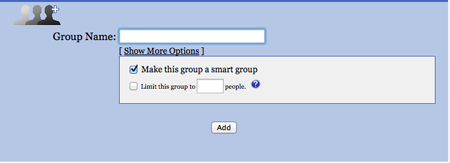
- Click on the icon titled Groups (people with plus sign).
- Enter a title for the group.
- Click Show More Options
- Click make this group a smart group

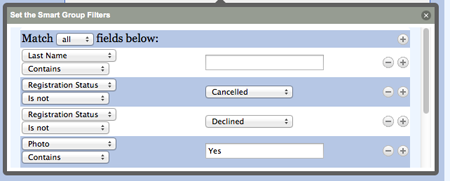
- Add a filter to search for the information

- Click Save
- Click Finished
- Click Add.
- The group will appear in the Smart Groups section below Groups.
Smart Group Limits
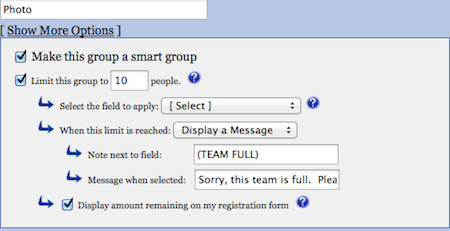
If you have a limited number of a particular option available, for example you only have 10 photo opportunities available, you can add the limit to the form by choosing the limit option.

- Click Limit this group and add the limit number
- Select the field that has the limit from the pulldown
- Choose the option for what to do if they limit is reached. The field can be hid or a message can be displayed
- Enter a note to appear next to the field
- Enter a message to be displayed if you selected that option
- You can display the amount remaining on the registration form.
If you already have registrants in your system that match the search criteria, then they will automatically appear in the smart group. Notice that they are not removed from the "normal" group they were originally registered to. Also keep in mind that the registrants in your smart groups are NOT duplicates in your system. They are more like shadows.