Emails can only be sent to people in your Ministry Sync database; invitations can be sent to anyone.
If you are using the Column Browser in FundEasy or the "What Would You Like To Do?" dropdown in AttendEasy, these will open the Send Email link for you and add the names of the people you selected to the "To:" field. In that case, start at step 2.
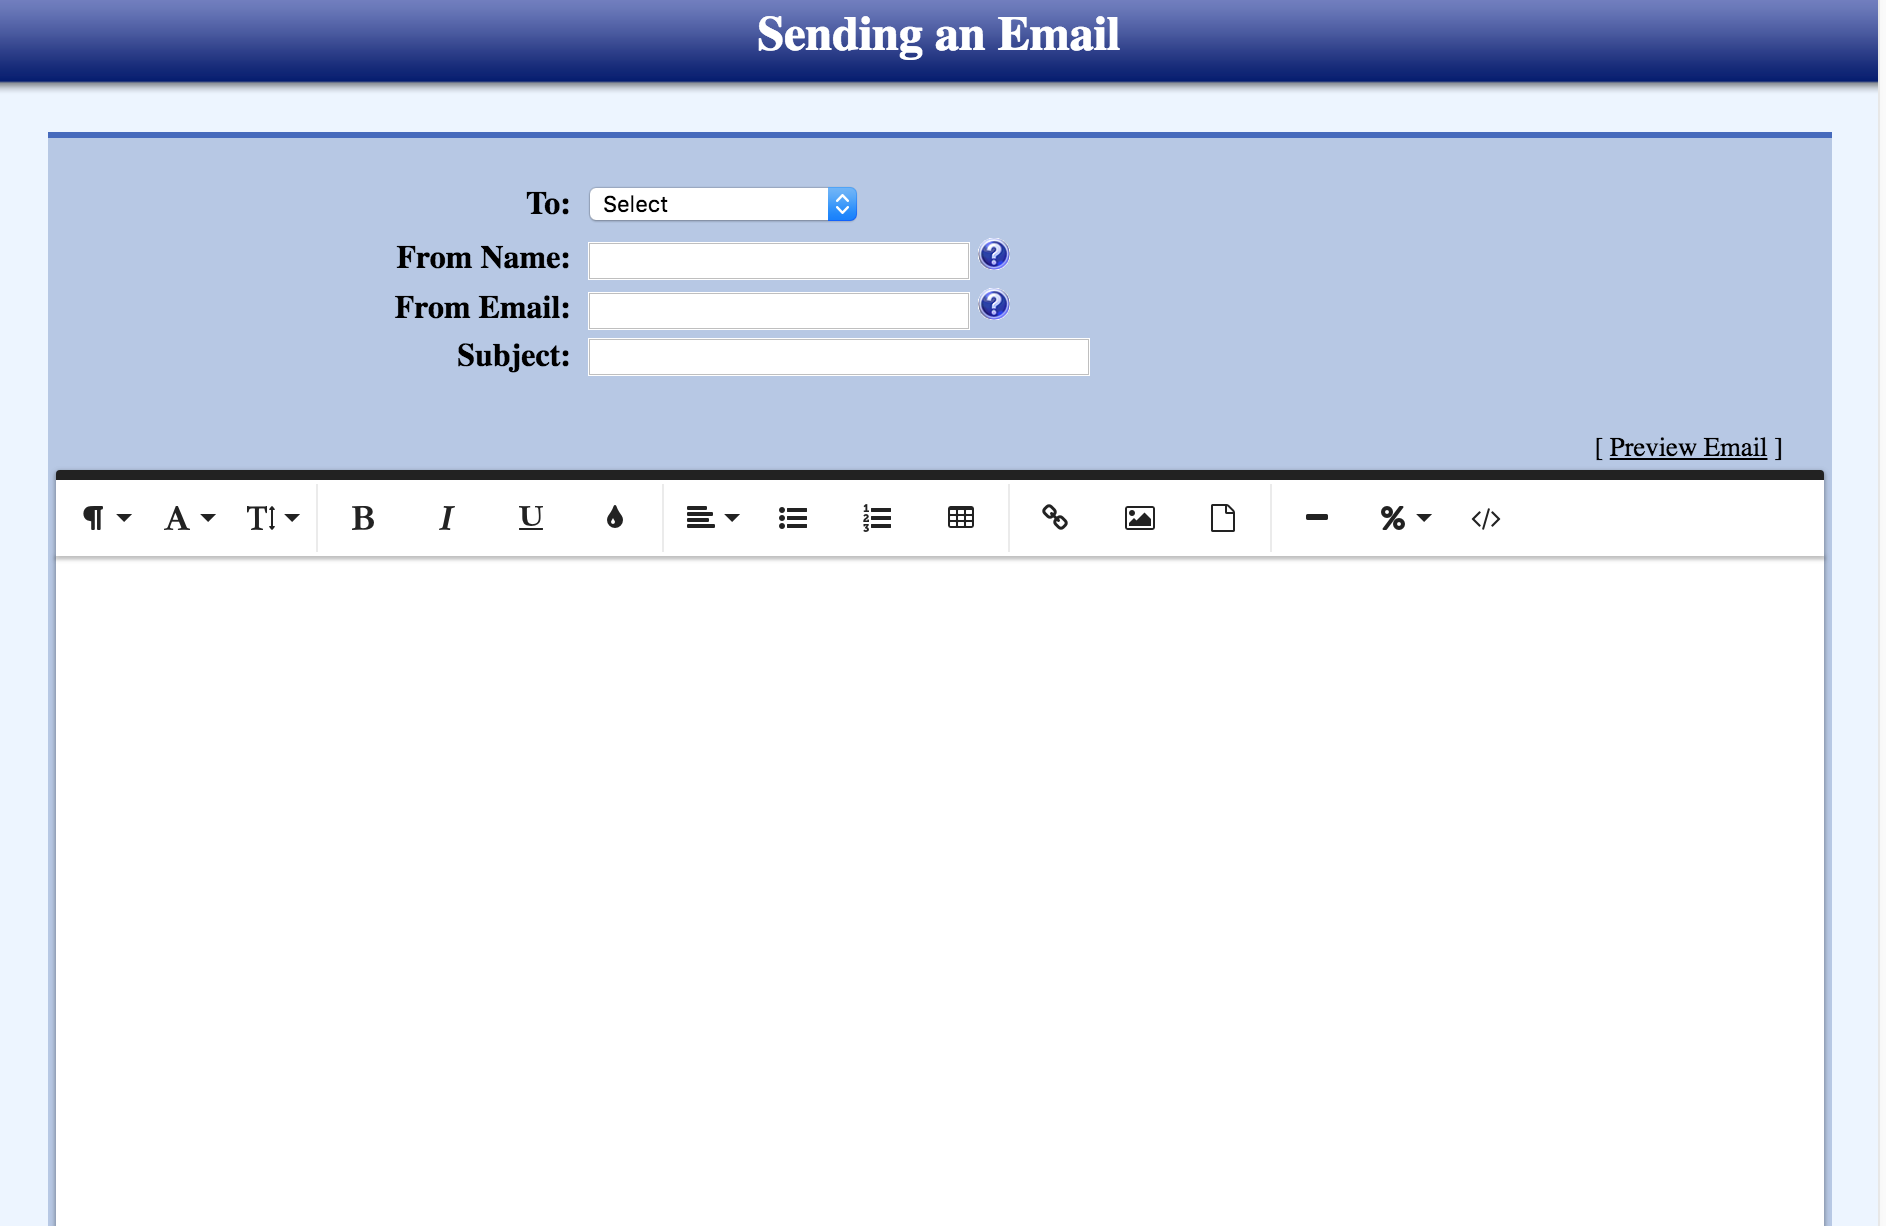
- Click Send Email at the top of your Registration Manager to open the Sending and Email page.
Select to whom you would like to send the email from the drop-down menu.
* Specific Guests from your event database.
* Pre-registered Guests -Pre-registered Guests (including hosts) who you expect to attend your event. This does *not* include Cancelled or Declined Guests. They can be emailed separately. See below.
* Cancelled Guests - those whose plans changed after registering.
* Declined Guests - those who declined your email invitation.
* All Group Hosts registered as a host for this event (regardless if their name is on the group title or not).
* Guests Who Attended- used AFTER your event and includes anyone marked as attended
* Guests Not Unattended -used AFTER your event and includes anyone not marked as attended. Does not include Cancelled or Declined Guests - From Name defaults to your organization’s name; you can change it if you wish. This is what the recipient will see in their inbox.
- From Email defaults to the email address of this event’s contact person; you can change it if you wish. The address in this field will be used as the reply-to address.
- Type in the Subject.
- Add the body of your email in the white box.
- You can add variables, such as table number, from the % (percent sign) in the editor tool bar.
- If you add images or tables, make sure they are no wider than 490 px or it will be wider than the template and will make it look like the banner is too small.
- It’s a good idea to preview the email before you send it. Click Preview Email.
- Click Send Email.
Note: A draft of your email will be saved and connected to your IP address until you send or cancel. If you will want to send this email several times, we recommend that you save it in your own text editor software.
Selecting Registrants from Sending Email Screen
- Choose Specific Registrants from the drop-down menu.
- Click Lookup to select the people you want to email.
- You can search for the person by typing their name into the search boxes at the top.
- Click Search.
- Click on the person’s name.
Emailing Cancelled Members
If you need to send out an email to all your cancelled registrants, you can do so following these steps.
- In your event, click "Send Email" on the toolbar at the top of the page.
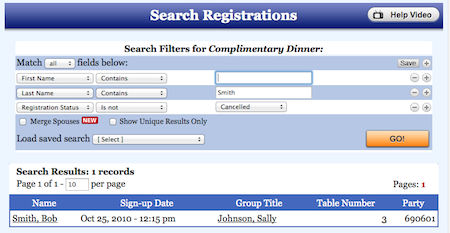
- With the "To:" pulldown, change it to say Specific Registrants, then click "Lookup."
- By default, there should be three filters: first name (blank), last name (blank), and "Registration Status is not cancelled." Change "is not" on the last filter to say "is" and hit go. Basically, you're searching for all the registrants who have a registration status of cancelled.

- Once the list of cancelled guests comes up, click their names one by one to add them to the box.
When you have them all selected, you can write and format your email, then send.
Other articles you may enjoy:
Managing your AttendEasy registrants
Managing your FundEasy registrants
Updated 7/15/16