Layouts allow you to create brand new configurations of groups and hosts without affecting your current group setup. Using layouts you can experiment with the arrangement of your registrants without changing the "real" data.
Here are some benefits of layouts:
- Layouts allow you to create a backup of your registrants at a certain point in time.
- Layouts allow you to move guests around and merge groups together without committing to these new configurations.
- Layouts allow you to separate your guests into any imaginable combinations, while maintaining your "real" set of groups and hosts.
Adding a Layout
- In the Viewing Options section of the Registration Manager, click the Toggle Layouts icon (it is the second icon from the left as shown below):

- A new section in the Viewing Options area will appear. One (1) Event Layout already exists, and it has the same name as your event (with the word Original appended to the event title).

Note: if you click the Toggle Layouts button again, the Layouts section will be hidden. - Click the Add a New Layout button.

- Type a name for your new layout.

- Click Continue.
- There are now two (2) Event Layouts, and the one you just created is displayed.
Change the name of a Layout
- Click the Toggle Layouts icon, if necessary, to display the Layouts section in Viewing Options.
- Select the layout you would like to edit.
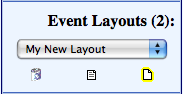
- Click the Edit Selected Layout icon (the middle icon, as shown above).
- Type the new name for this layout.
- Click OK.
Notes: Only layouts that you have created can be edited. The title of the original layout cannot be edited by clicking the Edit Selected Layout button (if you click the Edit Selected Layout button while the original layout is displayed, you will view a message that reminds you that the only way to change the name of the original layout is to actually edit the name of your event, under Event Details).
Advanced Layout Options
- Click the Toggle Layouts icon, if necessary, to display the Layouts section in Viewing Options.
- Click the Add a New Layout icon (the icon on the right, as shown above).
- Click [ Show More Options ]
- Fill in this information:
Item Description Add from: The layout name in this box will be the layout that was selected when you clicked Add a New Layout. You can select any other layout from the selection box on which to base this new layout. Copy Groups from selected layout. You can choose to have the Groups from the existing selected layout copied into this new layout. If you want the new layout to have no Groups, de-select this option. (Note: if you choose to de-select this option, all registrants will be placed into Unassigned.) Copy Table Chart from selected layout. You can choose to have the Table Chart from the existing selected layout copied into this new layout. If you want the new layout to have no Table Chart, de-select this option. - Click Continue
Delete a layout
- Click the Toggle Layouts icon, if necessary, to display the Layouts section in Viewing Options.
- Select the layout you would like to delete.
- Click the Delete Selected Layout icon (the first icon, as shown above).
- You will be asked to confirm the deletion of the selected layout. Click OK.