Create a new group
Promote a guest to a host
Rename a group, hide it on the registration form, and set group limit options
Delete a group
Move someone from one group to another
What is the difference between groups and parties?
Splitting up a party
Manually assign guests to the same party
Groups are automatically created when a host registers, but they can also be created and named by an admin.

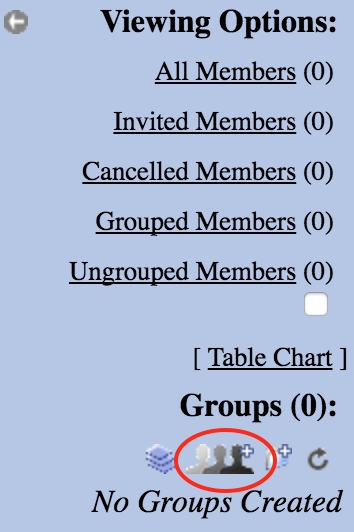
Create a new group:
- Choose Add a Group in Viewing Options
- Type in a new group title and click Add
- Groups don't need to have a table host if it's a host's second table or if the organization will be managing the table
Important: If your host needs to manage 2 tables, we recommend that all the guests of one host remain in the same group until you close registration so they can manage their entire group with one Host Manager email. After the event is closed, you can split the group into 2 groups.
Promote a guest to host
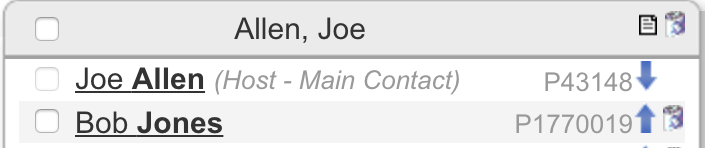
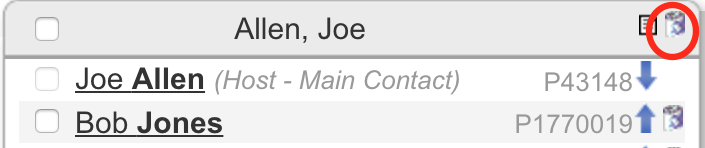
You can make an already-registered guest a host by using the promote arrow in the group.
- To promote a guest like Bob, click the blue up-pointing arrow to the right of his name
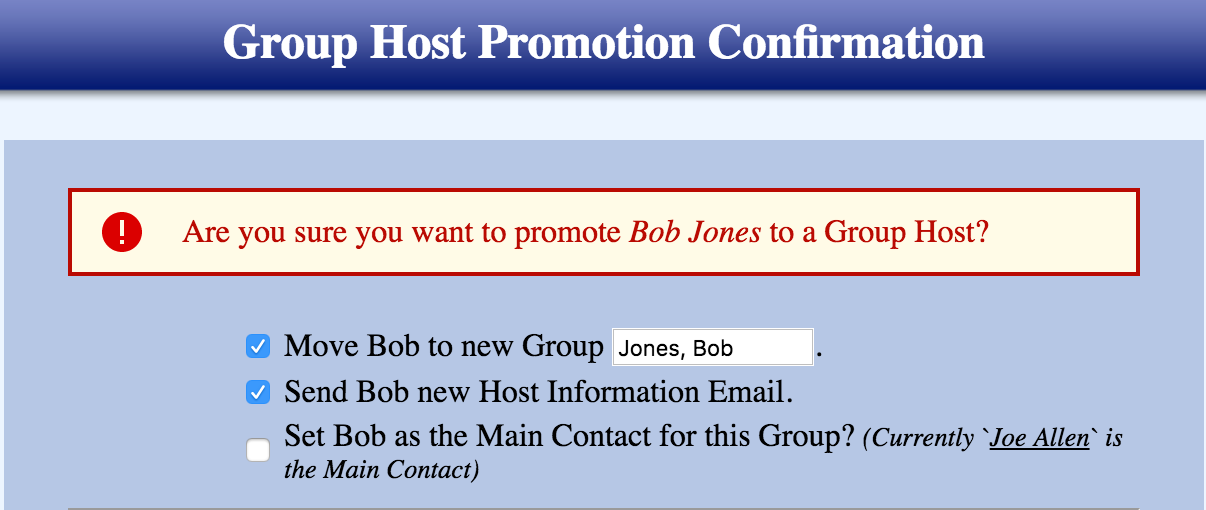
- This opens the Group host Promotion Confirmation page. Bob's group will automatically be named and created, unless you uncheck the top box on this page. Unchecking the top box will make him a host in the current group
- Bob will automatically get a host email, unless you uncheck the next box
- You can make Bob the Main Contact host, the person who is the default contact person for this group, or you can leave the third box unchecked if he's not the Main Contact.
- To demote a host to a guest, click the blue down-pointing arrow. This will also change the name of the group to <Group w/o a host>. So don't forget to rename the group.
Rename a group, hide it on the registration form, and set group limit options.
- Click the edit icon in the group header to open the header.
- Change the name of the group in the text box. Changing the name here also changes how it is listed in the Group Host List on the Registration form
- You also have the option to hide on a group from the Registration Form
- Click Limit Options to set a limit on the group


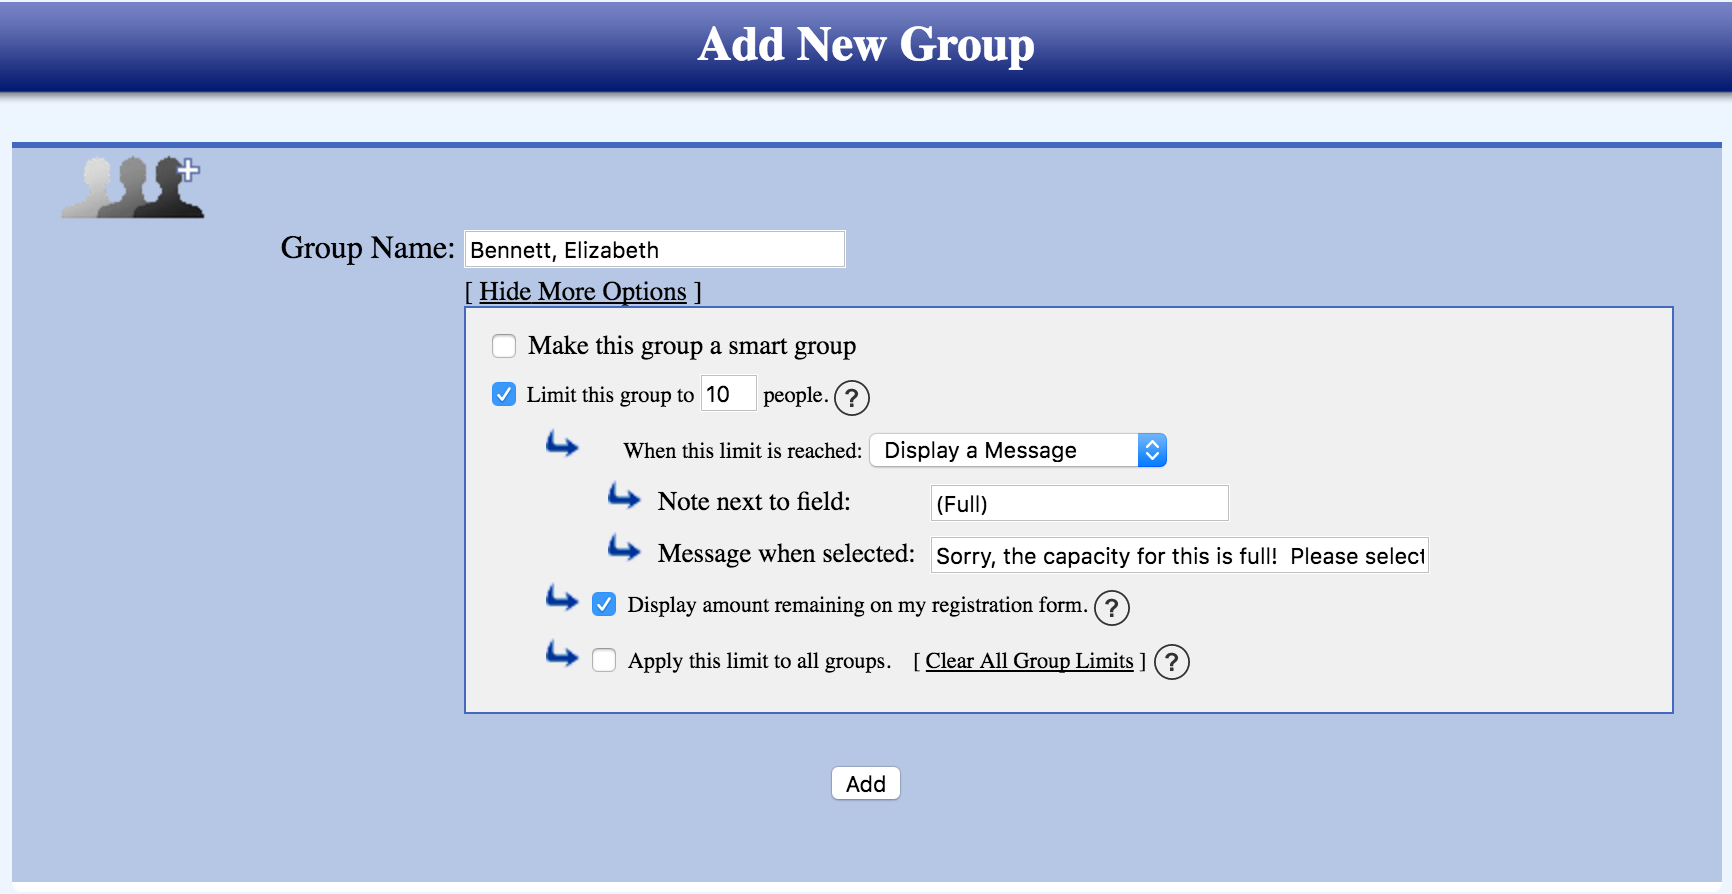
Group limits are not the same as the number of seats at your table. Ideally, you should only set group limits
- if your venue size is limited
- if sponsors or hosts are paying for a set number of seats
- if teams in FundEasy have team limits set in FundEasy Preferences
Delete a group
- Under Groups, click on the group you would like to delete.
- Click on the recycling can icon to the right of the title for the group you wish to delete.
- A notice will appear and ask if you are sure you want to delete this group. Click OK.
Note: Any unhidden groups without a title will show in your registration form as "Group Without Host." You should delete, rename, or hide this group.
Move someone from one group to another
You can use the What would you like to do? pulldown on the bottom of the Registration Details page to move people between groups, but this shortcut is handy. Just click the checkbox next to the name of the person you want to move, then click the name of the group you're moving them to.
You can also merge two groups together without demoting hosts.
- Click the checkbox next to both groups you are merging in the left column so that they are in the center of your page.
- Click the delete group icon (trash can) in the header of the group you want to merge.
- You'll be asked to confirm that you want to delete the group
- Next you'll be warned that the group is not empty and asked to choose a group to move them to.
- Click the name of the group you'd like to move them to, like in the .gif above.
- If the host you have moved needs access to their host manager, you'll need to send them a new host manager email.
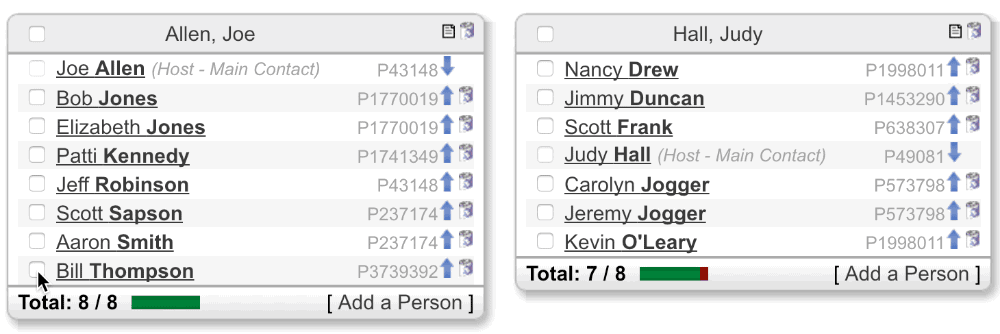
What is the difference between groups and parties?
Parties are people who are attending together. Groups are a collection of parties. Usually a party is a husband and wife, but it could include friends or family members. Party numbers keep people together when they are moved from group to group.
Guest who are registered together share the same party number. The party number, or P number, can be found at the right end of the group.

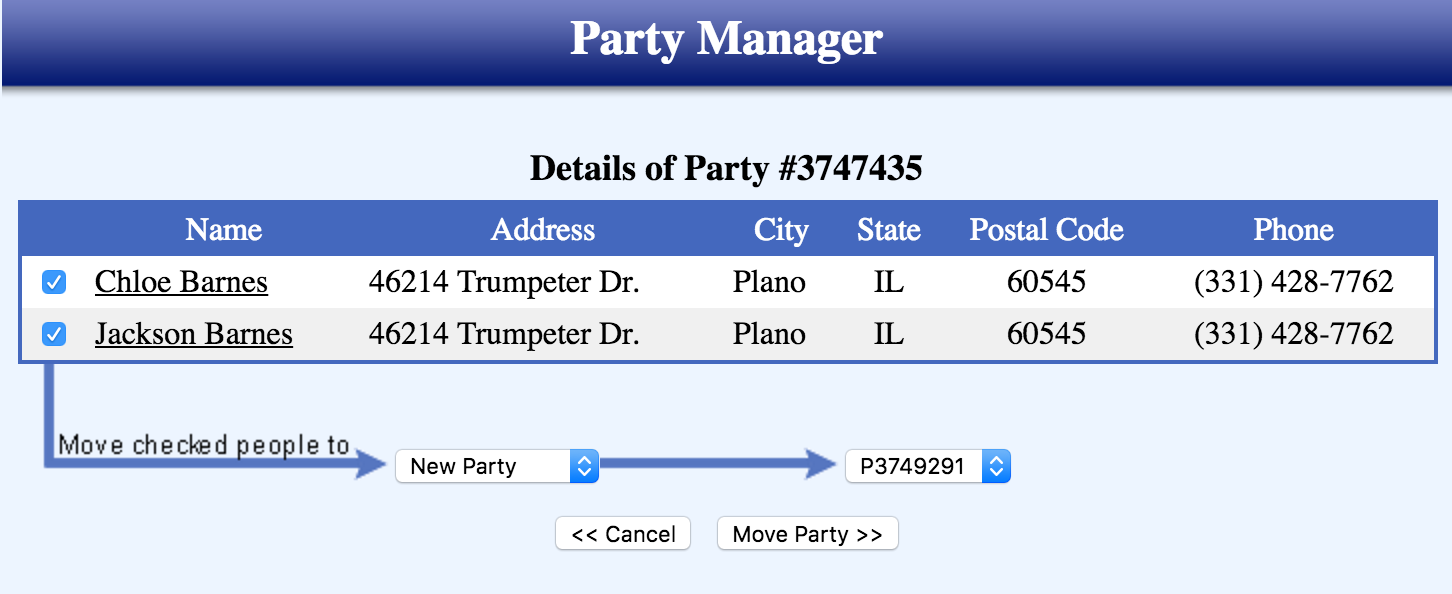
Splitting up a party
Guests with the same party number will always be moved together. However, sometimes you need to move one person, not the whole party. Here's how to break up that party.
- Click on the party number of the guest you want to remove
- This will open the Party Details page. Make sure only the guest you want to move are checked.
- You can give them a brand new party number by selecting New Party from the first drop-down menu.
- Click the Move Party button
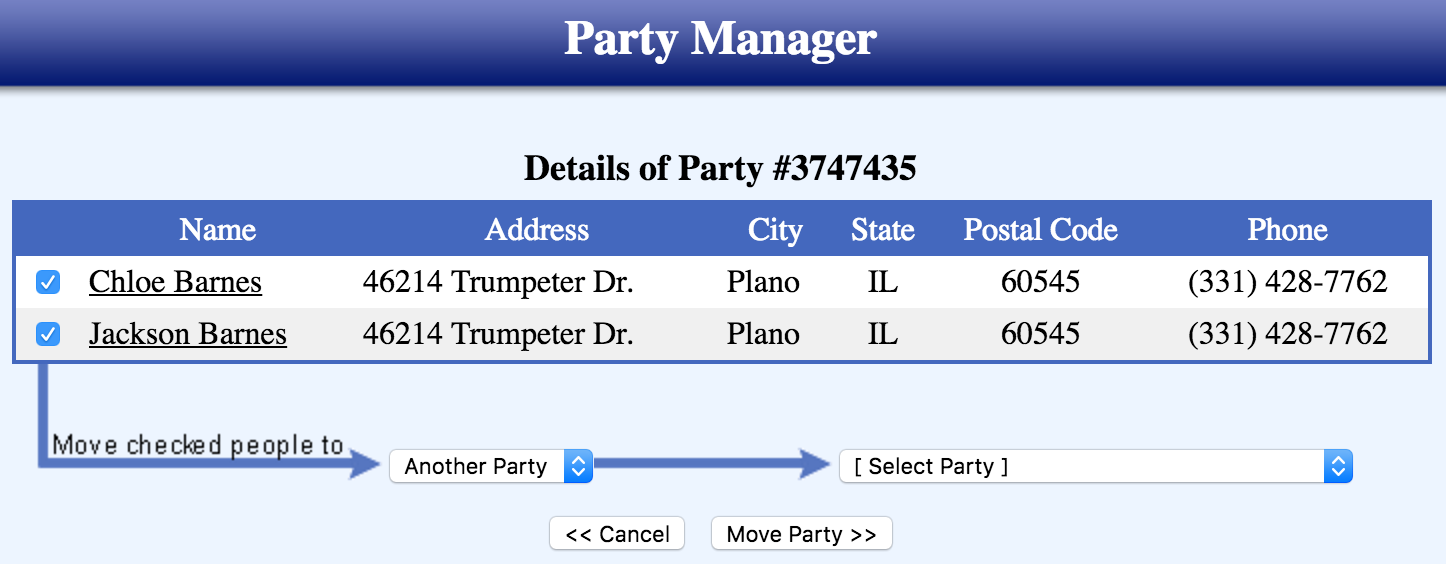
Manually assign guests to the same party
Guest who did not register together can have their party number manually changed to be the same number. This is not the same as moving people into Groups.
- Click on the party number of the guests whose party number you want to change
- From the first drop-down menu, select Another Party
- From the second drop-down menu, select the party number you want to assign them to. Note: This pulldown does not show a group name. Instead it shows the name of a person in that party.
- Click the Move Party button.
Updated 7/28/16